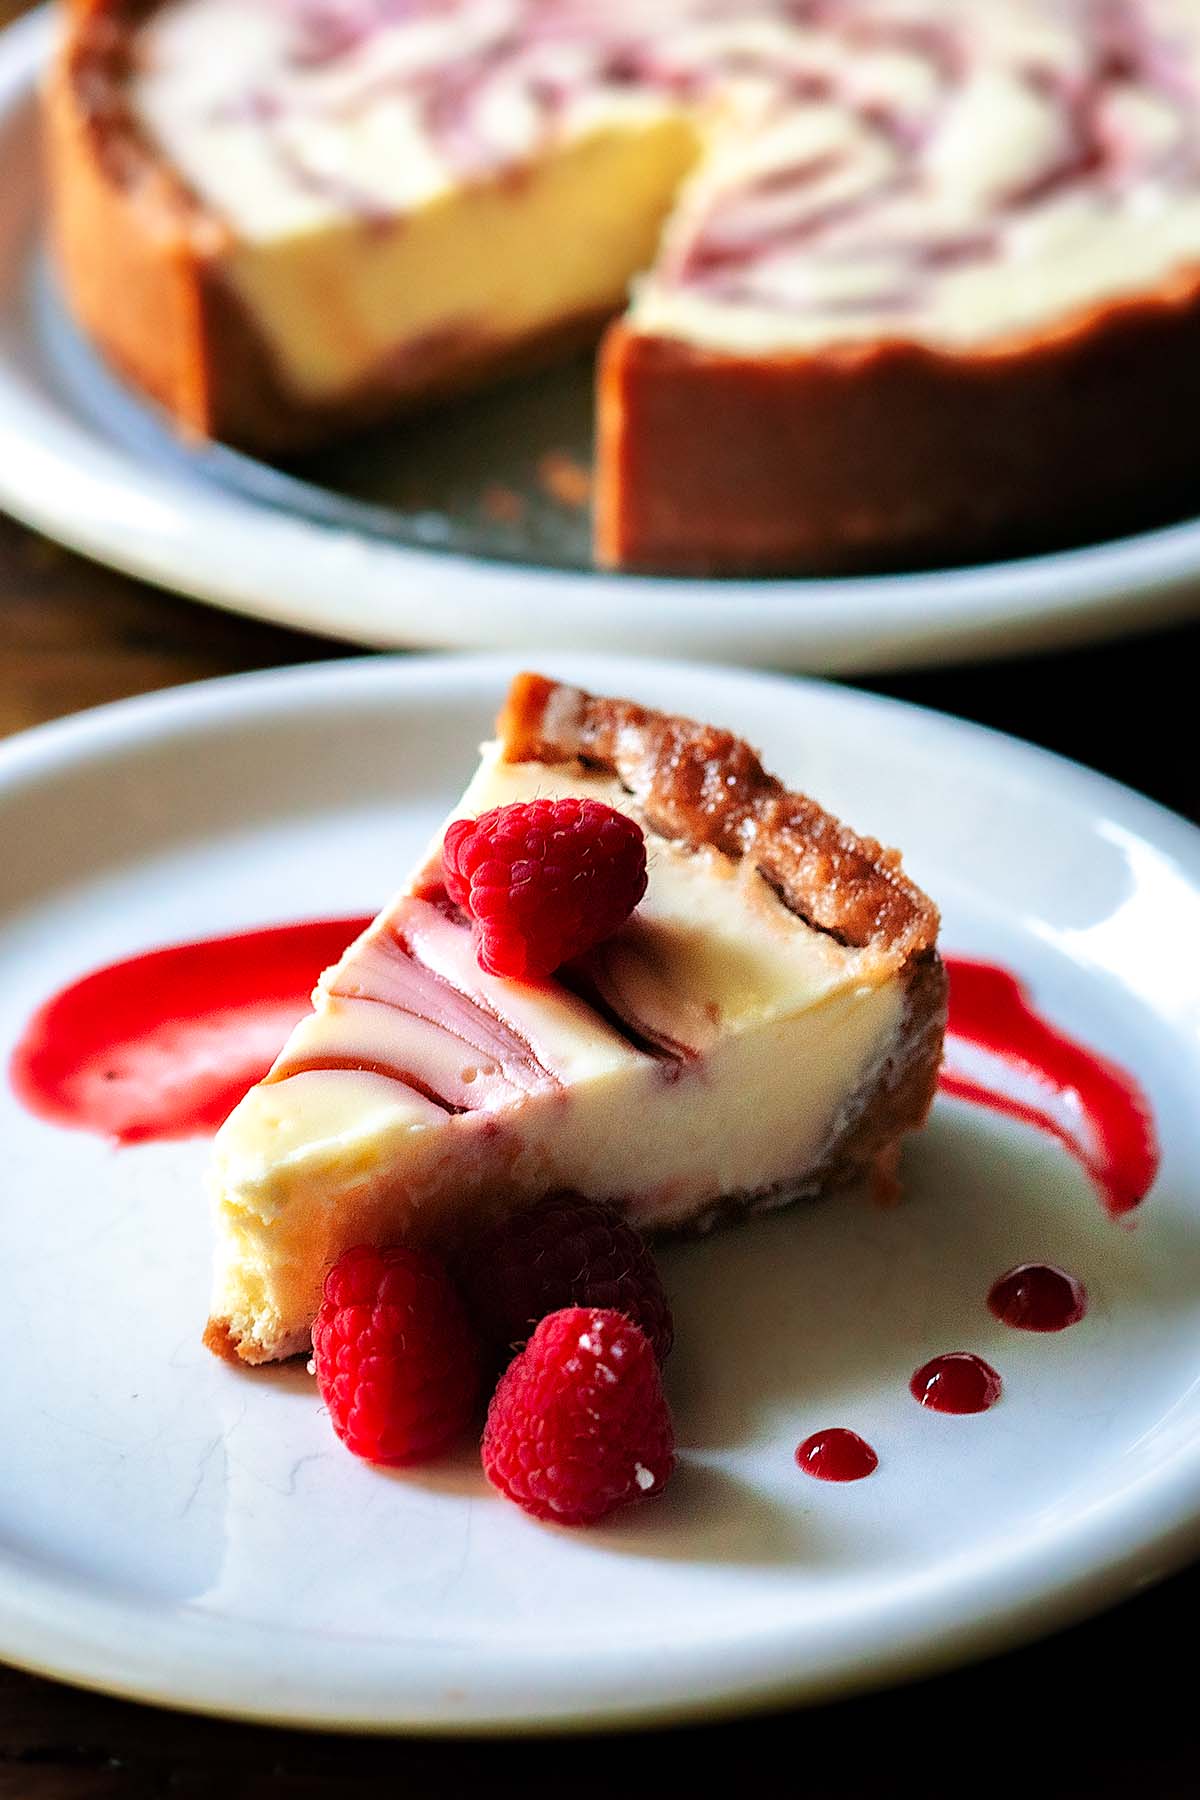
This Hatch Chile Raspberry Instant Pot Cheesecake is such a beautiful and flavorful dessert; you'd be shocked at how easy it is to make. The silky texture, sweet with a kick of spice, and cookie-like graham cracker crust will leave you feeling mind-blown.
Jump to:
Why You'll Love This Recipe
Making Instant Pot Cheesecake is a breeze, and when you consider the ease of use of the Instant Ace Nova Blender for the Hatch Chile Coulis, this is a must-make. The Hatch Chile Roast compliments the raspberries' sweetness in an almost unexplainably amazing way.
Ingredients
For this Instant Pot Cheesecake, you won't actually need much. All you'll need are Graham Crackers, Butter, Sugar, Orange Juice, Fresh Raspberries, Cream cheese, Kosher Salt, Vanilla Extract, and Eggs
See the recipe card below for full information on ingredients and quantities.
Step-by-Step Instructions
Graham Cracker Crust
First, begin by buttering an 8" springform pan. Be sure to do so generously all over the bottom and sides.
Next, add the melted butter, sugar, and graham crackers to a blender and pulse until everything is well combined.
Now spoon this mixture into the buttered springform pan and spread it evenly across the bottom and about halfway up the sides using your hands.
Set the crust aside while you work on the Coulis and Cheesecake mixture.
Hatch Chile Raspberry Coulis
I used the Instant Ace Nova Blender for this recipe, which is amazing. I didn't realize how amazing it was until I accidentally wasted time making this Hatch Chile Raspberry Coulis for my Instant Pot Cheesecake.
Allow me to explain. If you don't have the Ace Nova, this next part is for you. But I highly recommend treating yourself to one. It's a real game-changer in the kitchen.
The way I would normally make this coulis in my pre-Ace Nova life would be to add the sugar and orange juice to a sauce pot on the stove over medium-low heat. Stirring the sugar into the juice until it's dissolved. I would then Add the fresh raspberries and Hatch Chile Roast to a slow boil and continue stirring for about 10-15 minutes, allowing the solids to break down until they become sauce-like.
THEN...I would place it all in a blender to create a puree and strain it through a fine mesh strainer to create the coulis.
I did all of those steps leading up to the blender. I placed my hatch chile raspberry sauce into the Instant Ace Nova Blender, locked the lid in place, and pushed the puree button.
Surprisingly, the blender pulsed briefly and then began boiling my already-boiled sauce!
This reminded me of a childhood memory of seeing David Copperfield make the Statue of Liberty disappear.
I was so excited and mind-blown that I didn't even care about the 20 minutes I had just wasted doing something the blender was doing for me!
So, you can, of course, follow either method of heating and blending the coulis, but with the time you'll save from the Ace Nova doing the leg work for you, the possibilities are endless of what you could do with that time. Then add in the fact that you aren't dirtying a spoon or pot.
Once you have the puree blended all up, it's time to make the coulis. Using a fine mesh strainer over a medium-sized glass mixing bowl, pour the puree slowly into the strainer. Allow the liquid to separate from the solids. Scrape the bottom of the strainer using a silicone spatula into the liquids and discard the solids.
Repeat this step until you have separated it and a beautiful bowl of Hatch Green Chile Raspberry Coulis.
Pour the coulis into a plastic squeeze bottle and pop it in the fridge until your cheesecake mixture is ready.
Cheesecake Filling Recipe
I feel like many home cooks, including myself, have always wondered how to make a cheesecake filling to the extent of almost being too intimidated even to try.
I'm here to tell you that making the filling for cheesecake is very simple!
First, place room-temperature cream cheese into a stand mixer equipped with the flat beater accessory. Turn the stand mixer on medium speed and beat the cream cheese until it becomes soft and fluffy, like a cloud of deliciousness.
Next, turn the mixer to low and add the sugar, salt, and then the eggs. Allow the mixture to combine, and then turn it off fully.
That's it. You're done! See, I told you it was easy!
Assembling and Cooking the Instant Pot Cheesecake
Working in layers and using a large spoon, begin to pour the cheesecake filling into the crust, making an even layer. Now grab the coulis and squeeze a few swirls on the filling. Repeat this step until all of the cheesecake filling is in the crust.
Squeeze a few more generous swirls or whatever pattern you like on the top. Using a skewer or long toothpick, lightly swirl the coulis around, creating beautiful patterns in your cheesecake. Don't over-mix it though; otherwise, you'll end up with a pink cheesecake.
Start by pouring one cup of water into the bowl of your Instant Pot. Next, set the trivet into the bottom of the pot, followed by the spring form pan full of amazing Hatch Green Chile Raspberry Cheesecake.
Now, lock the lid into place on the Instant Pot and set it to pressure cook, manual, high, with the keep warm option turned off.
Cook the Instant Pot Cheesecake for 27 minutes and then turn it off, allowing for natural release. This will take about 25 minutes.
Once the Instant Pot fully releases the pressure, remove the springform pan and place it on a cooling rack for about 15 minutes. Once it's cooled, place it in the fridge for an hour, then cover it with plastic wrap, refrigerate for another hour, and serve within two days.
Expert Tips
- I like to serve cheesecake garnished with fresh raspberries and artistically plated with extra Hatch Green Chile Raspberry Coulis. If this is for an adult dinner party or even an at-home date night, consider small glasses of Framboise as accompaniment.
- I highly recommend using a cooking blender for the coulis. It will save a lot of time, allowing you to work on other parts of the recipe simultaneously.
- When straining the coulis, be sure to scrape the bottom of the strainer. This is where a lot of the flavor resides.
Recipe FAQs
Yes. Silicone, stainless steel, and aluminum spring form pans are all Instant Pot safe and can be used.
A water bath is a shallow pan of water that keeps the cheesecake from cracking on top and helps ensure you get that creamy, smooth texture.
No, not all cheesecake requires a water bath. The water bath is especially helpful for larger, deeper cheesecakes. It may not be necessary if you are making smaller cheesecakes that are smaller than 6 inches in diameter or 2 inches deep.
Most Instant Pot models will fit a 6-inch or 7-inch springform pan, providing the latch on the pan is fairly flush. The larger models, such as the Instant Pot Duo Crips, will hold an 8-inch spring form pan, but it's a tight squeeze.
More Recipes You'll Love
If you made this Instant Pot Hatch Green Chile Raspberry Cheesecake recipe or any other of my recipes, please leave a Star Rating and let me know your thoughts in the comments below.
Don't forget to tag @chickenfriedkitchen on Instagram, Subscribe on Youtube, and Follow on Pinterest and Facebook! I'll see you there!
📖 Recipe

Instant Pot Cheesecake with Hatch Green Chile Raspberry Coulis
Ingredients
Graham Cracker Crust
- 16 Sheets Graham Crackers
- ½ Cup Sugar
- 1 Cup Salted Butter-Melted
Hatch Chile Raspberry Coulis
- 1 Cup Sugar
- ⅓ Cup Orange Juice
- 16 Ounces Fresh Raspberries
Cheesecake
- 16 oz Cream Cheese - Room Temperature
- ¾ Cup Sugar
- ½ teaspoon Kosher salt
- ½ teaspoon Vanilla Extract
- 2 Eggs - Room Temperature
Instructions
Graham Cracker Crust
- Butter the entire inside of a springform pan.
- In a blender, pour in melted butter, sugar, and graham crackers and pulse a few times until fully combined.
- Spoon the graham cracker mixture into the springform pan. Using your hands form the crust across the bottom and about half way up the sides.
Hatch Chile Raspberry Coulis
- In a cooking blender, pour in the sugar, orange juice, fresh raspberries, and Hatch Chile Roast. Lock the lid in place and press puree. Allow the Blender to work its magic.
- Working in batches and using a fine mesh strainer over a medium-sized mixing bowl, slowly pour the puree into the strainer. Stir the puree to allow the liquid to separate from the solids. Be sure to run a spatula underneath the strainer to keep the liquid from the bottom of the strainer. Discard the solids and repeat this step until you have strained all the puree liquid. Now you have a coulis.
- Transfer the Hatch Chile Raspberry Coulis to a squeeze bottle.
Cheesecake
- In an electric stand mixer using the flat beater accessory, place the cream cheese into the bowl and mix on medium speed for about 3-4 minutes until the cream cheese becomes fluffy.
- Turn the stand mixer to low and mix the sugar, salt, vanilla extract, and eggs until just combined.
- Working in layers and using a large spoon begin pouring about 1-2 spoonfuls into the crust then squeeze a few swirls of coulis. Repeat the process until all of the cream cheese mixture has been placed in the crust.
- Lastly, give the top of the cheese cake a few generous swirls of coulis. Then using a skewer or long toothpick swirl the coulis into the cheesecake mixture. Don't over do it though otherwise you'll lose the overall look and end up with just a pink cheesecake.
Cook the Instant Pot Cheesecake
- Pour one cup of water into the bottom of your Instant Pot Bowl.
- Set the trivet inside of the bowl making sure the handles are up for easy and safe removal of the springform pan when it's complete.
- Place the springform pan in the trivet on the inside of the Instant Pot.
- Lock the lid onto the Instant Pot and set it to pressure cook, high, and turn off the keep warm setting.
- Cook for 27 minutes and then turn the pressure cooker off and allow a natural release for about 25 minutes.
- Once all of the pressure has released, remove the springform pan using hot pads. This can be a little tricky because it's a tight fit. But a little patience and you'll get it out of there!
- Place the springform pan on a cooling rack or hot pad and allow it to cool for about 15 minutes then refrigerate it for an hour uncovered. Cover it with plastic wrap, refrigerate for another hour, and serve when ready.
Notes
- I like to serve cheesecake garnished with fresh raspberries and artistically plated with extra Hatch Green Chile Raspberry Coulis. If this is for an adult dinner party or even an at-home date night, consider small glasses of Framboise as accompaniment.
- I highly recommend using a cooking blender for the coulis. It will save a lot of time, allowing you to work on other parts of the recipe simultaneously.
- When straining the coulis, be sure to scrape the bottom of the strainer. This is where a lot of the flavor resides.

Lynn M Cobb-Alvarez says
How much roasted Hatch are you using in the coulis?
Jeremy Klae says
I am so sorry for the late reply and not sure how I missed such an important part of the recipe. I used a 1/4 cup of hatch chile roast.